Creating Corporate Structure
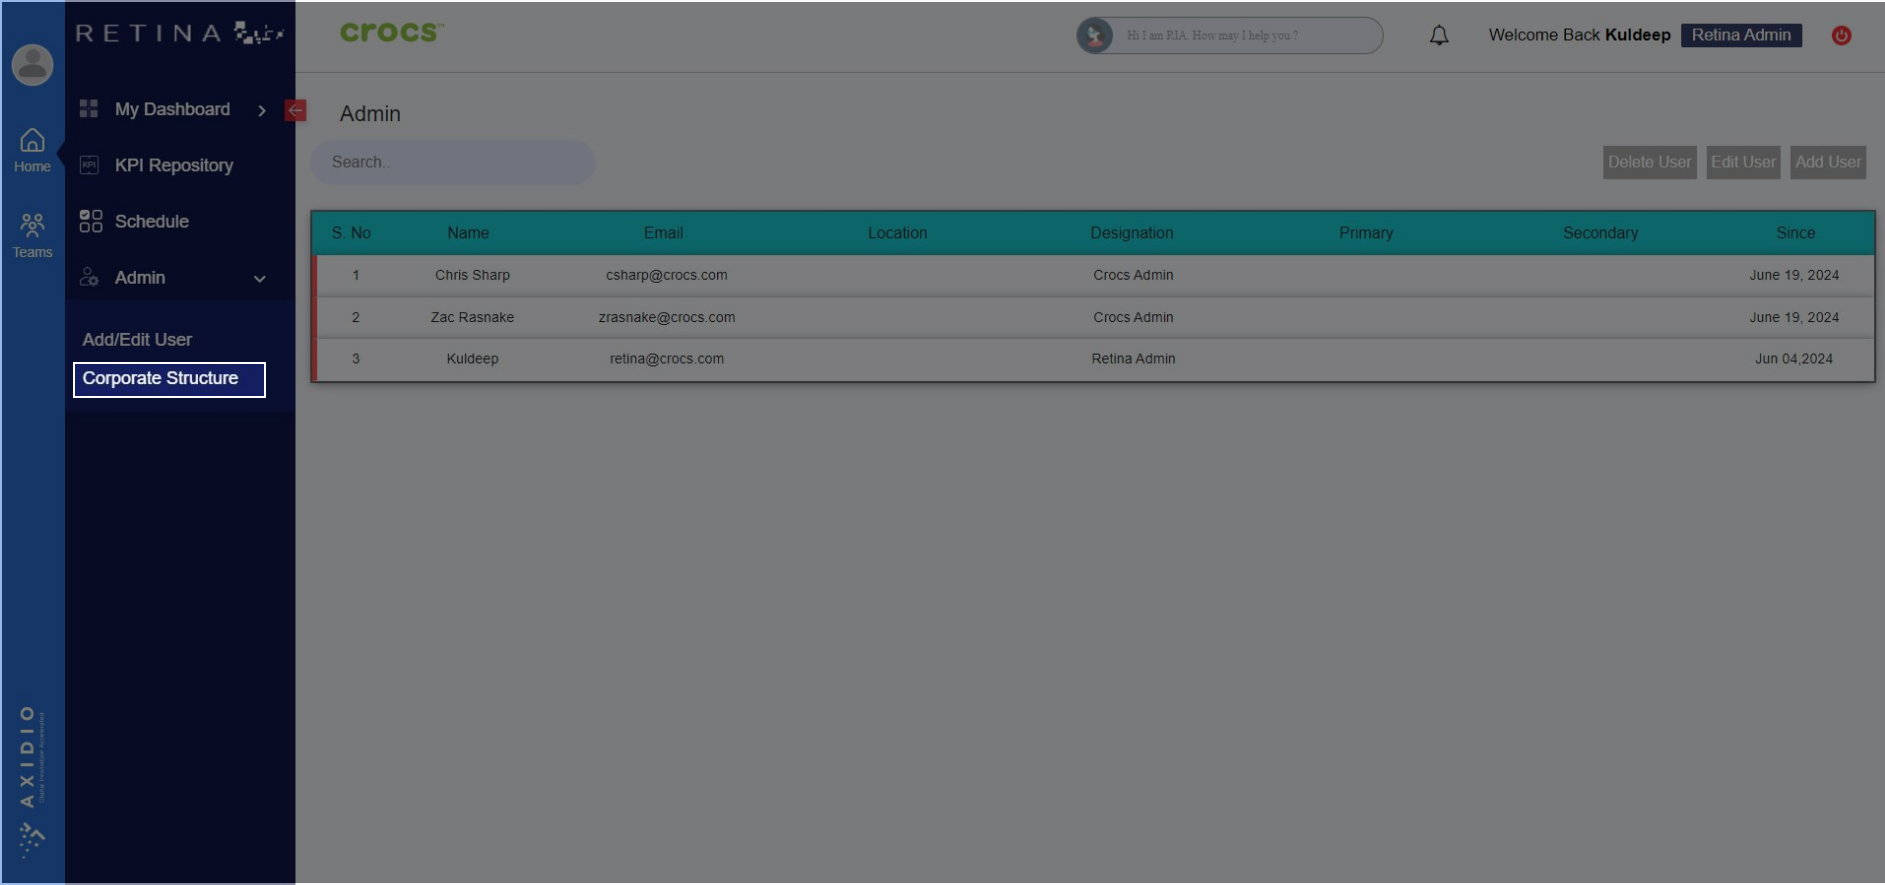
1. Click on Admin

2. Click on Corporate Structure
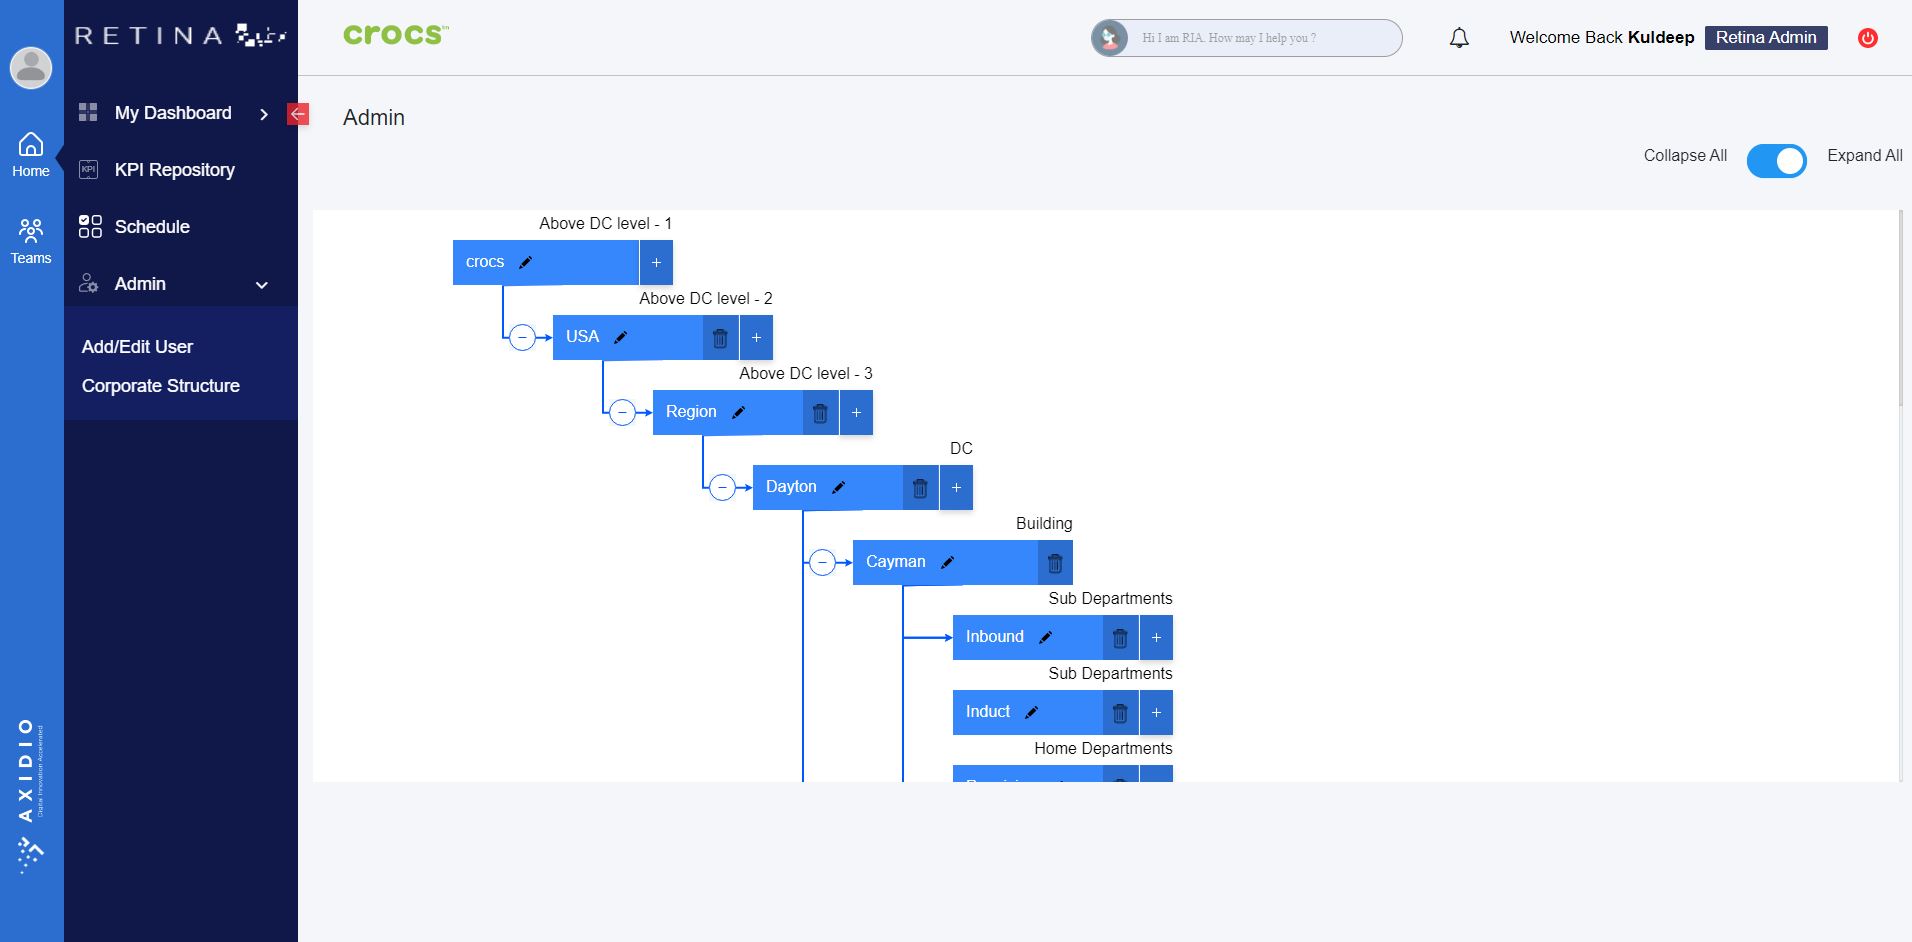
3. . + Icon: Used to add Area/Region/DC/Building/Departments at different nodes of corporate structure tree
Delete icon: Used to delete a node
Edit icon: Used to edit node name
Slide button: Used to collapse/expand all the nodes in the tree
Note: Hit enter after adding/editing a node
1. Start at the top with the label “Crocs.” This represents the highest level.
2. Move down through “Above DC level - 1,” “Above DC level - 2,” and finally “Above DC level - 3.” Each step represents descending levels within the organization.
3. From “USA,” move laterally to reach the “Region” box.
4.From “Dayton,” DC you can either explore further by clicking on the plus sign (indicating expansion) or move horizontally to reach “Cayman.”
5.At “Cayman,” you can view details about “Building” directly or explore deeper into “Sub Departments” and “Home Departments” by clicking their respective plus signs.